Jumping into video editing can feel overwhelming. With countless tools, techniques, and terminologies, it's easy to get lost before you even import your first clip. But creating polished, professional-looking videos is more accessible than ever, thanks to intuitive software and powerful new AI tools. This guide is designed to cut through the noise, providing a clear roadmap with essential video editing tips for beginners that deliver immediate results.
Whether you're an e-commerce brand creating product demos, a social media manager producing on-brand visuals, or a filmmaker exploring new creative workflows, mastering these fundamentals is non-negotiable. Strong editing skills transform raw footage into a compelling narrative, hold audience attention, and communicate your message with clarity and impact.
This playbook offers more than just technical instructions; it provides a strategic foundation for efficient and effective video creation. We will cover ten core principles, from structuring your story and organizing your files to mastering color, audio, and pacing. Each tip is designed to help you avoid common pitfalls and establish a workflow that saves time while dramatically enhancing the quality of your final product. Let’s dive in and equip you with the confidence to start editing like a seasoned pro.
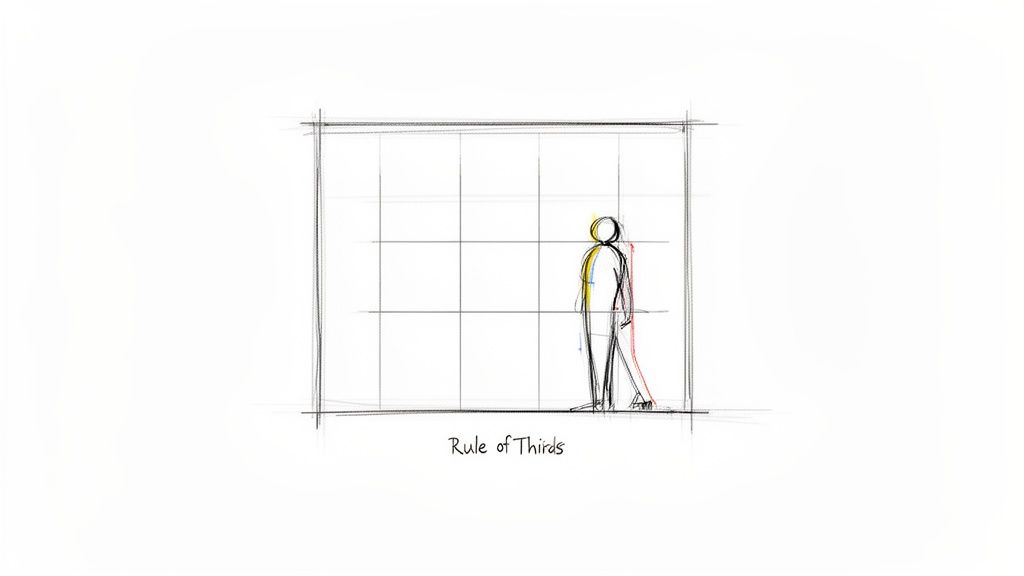
1. Start with the Rule of Thirds for Better Composition
The Rule of Thirds is a foundational composition guideline that immediately elevates the visual quality of your videos. Imagine your video frame divided into nine equal rectangles by two horizontal and two vertical lines. This creates a grid, and the principle suggests placing your most important subjects along these lines or at their four intersection points. Following this simple guide creates a more balanced, dynamic, and professional-looking shot.
This technique draws the viewer’s eye naturally to the key elements of your frame. Instead of placing your subject dead-center, which can feel static and uninteresting, positioning them off-center adds visual tension and appeal. This is one of the most effective video editing tips for beginners because it requires no advanced software skills yet delivers a significant impact.
How to Apply the Rule of Thirds
Whether you're filming a product demo or creating an animated tutorial, implementing this rule is straightforward. For instance, in a product showcase, place the product on a left or right intersection point to give the frame breathing room. In a tutorial video featuring an AI avatar, position the avatar along a vertical line, leaving the other two-thirds of the screen for text overlays or visual aids.
Actionable Tips for Implementation
- Enable Grid Overlays: Most cameras and editing software have a "grid" or "thirds" overlay. Turn this on to have a constant visual reference while filming and editing.
- Practice Before Filming: Look through your camera or a mockup frame and practice identifying where the lines and intersections fall. This trains your eye to compose shots effectively on the fly.
- Use AI Composition Guides: Tools like Veemo AI often include composition guides. When generating video from a prompt, you can instruct the AI to adhere to the Rule of Thirds for instantly well-framed results.
- Fix It in Post-Production: If your original footage isn't perfectly framed, you can often crop and reframe your shots during the editing process to align with the rule.
2. Master the Art of Proper Pacing and Timing
Pacing is the rhythm of your video, dictating how quickly scenes and cuts flow to create a specific mood. Proper timing is crucial for keeping viewers engaged; it ensures the video's speed matches its content and tone. For anyone learning video editing, mastering pacing prevents common errors like holding a shot too long, which can bore the audience, or cutting too quickly, which can feel disorienting and chaotic.
This technique is one of the most vital video editing tips for beginners because it directly controls the viewer's emotional journey. Different content requires different rhythms. A fast-paced product video uses quick cuts to build excitement, while a slower-paced educational tutorial allows viewers time to absorb information. Getting this balance right is key to a professional and effective final product.

How to Control Pacing
Pacing is all about the duration of your clips and the frequency of your cuts. For an e-commerce product video, you might use rapid cuts of 2-3 seconds per angle to create a dynamic, energetic feel. Conversely, an educator's tutorial video would benefit from longer shots of 4-6 seconds to ensure concepts are clearly understood. For high-impact social media ads, cuts can happen every 1-2 seconds to maintain attention in a fast-scrolling feed.
Actionable Tips for Implementation
- Analyze Competitors: Watch successful videos in your niche and time their cuts. This gives you a practical benchmark for what works for your target audience.
- Cut to the Beat: Use your background music or audio track as a guide. Aligning your visual cuts with the rhythm of the music creates a cohesive and satisfying viewing experience.
- Refine in Passes: Create a rough cut first to get the story down. Then, go back through your timeline specifically to adjust and tighten the timing of each cut in subsequent passes.
- Use B-Roll Strategically: B-roll footage (supplemental shots) can be used to extend the duration of a scene or idea without making the main shot feel slow or stagnant.
3. Use Color Correction to Enhance Visual Consistency
Color correction is the technical process of adjusting your footage to achieve proper exposure, white balance, and accurate colors. This foundational step ensures every clip looks natural and cohesive, creating a seamless viewing experience. For beginners mixing different video sources, like AI-generated clips with smartphone footage, color correction is what unifies the final product into a polished, professional piece.
Unlike color grading, which is about creative style, color correction is about technical accuracy. It’s one of the most crucial video editing tips for beginners because it fixes visual inconsistencies that can distract viewers. Correcting color is essential for maintaining brand identity, especially in e-commerce marketing content where product accuracy is key.

How to Apply Color Correction
Imagine creating a product video that combines a 360° demo filmed in-house with an AI-generated background. Color correction ensures the lighting on the product matches the background, making the composition believable. Similarly, in a tutorial series, applying consistent color correction across all lessons ensures a uniform, high-quality look that builds viewer trust.
Actionable Tips for Implementation
- Follow a Logical Order: Make your adjustments sequentially for the best results: first exposure, then contrast, followed by white balance, and finally saturation.
- Use Scopes as Your Guide: Rely on your editing software’s histogram and vectorscope tools. These objective guides are more reliable than your eyes for achieving perfect balance.
- Create and Use Presets: Once you’ve corrected one clip, save those settings as a preset. You can then quickly apply this preset to other clips filmed in similar conditions, saving significant time.
- Establish a Reference Frame: Choose one well-lit shot from your sequence as a “hero” frame. Adjust all other clips to match this reference for ultimate consistency.
4. Leverage Transitions Strategically (But Don't Overuse Them)
Transitions are the visual bridges that connect one video clip to the next. While it's tempting for beginners to experiment with flashy wipes, spins, and starbursts, the most professional and effective editing relies on simplicity. A strategic approach to transitions enhances your story's flow and emotional impact rather than distracting from it.
The hard cut, an instant switch from one shot to another, should be your default choice for its clean and direct feel. Other transitions, like fades and dissolves, serve specific narrative purposes, such as indicating the passage of time or softening a shift in mood. This is one of the most critical video editing tips for beginners because mastering subtle transitions is a hallmark of polished, high-quality video content.
How to Apply Strategic Transitions
In a product video, use quick, clean cuts to cycle through different features, maintaining a brisk and informative pace. If you are creating a lifestyle segment showing the product in use, a gentle fade or dissolve can connect scenes to create a smoother, more relaxed feeling. For a tutorial video, a simple dissolve can effectively show the progression from one step to the next without an abrupt jump.
Actionable Tips for Implementation
- Default to the Cut: Make the standard cut your go-to transition. It’s clean, professional, and keeps the viewer focused on your content.
- Limit Fades and Dissolves: Use more deliberate transitions like fades for only 5-10% of your edits. Reserve them for the beginning or end of a sequence or to signal a significant shift.
- Time Transitions with Audio: Align your cuts and fades with the beat of your background music or the rhythm of your narration to create a more cohesive and satisfying viewing experience.
- Ensure Every Transition Has a Purpose: Before adding a transition, ask yourself what it accomplishes. Is it showing time passing, changing locations, or enhancing the mood? If it's just for decoration, a simple cut is better.
5. Work with Proper Audio Levels and Audio Mixing
Poor audio can ruin an otherwise great video, making it feel amateurish and unprofessional. Proper audio mixing is the process of balancing dialogue, music, and sound effects to ensure every element is clear and serves its purpose. Good audio quality is one of the most impactful video editing tips for beginners because it directly influences how viewers perceive the overall quality of your production.
For beginners, this means preventing background music from overpowering spoken words or ensuring sound effects add emphasis without being distracting. The goal is to create a seamless auditory experience where dialogue is the star, and all other sounds support it. Consistently managing audio levels across your entire project creates a polished, high-quality feel that keeps your audience engaged.
How to Apply Audio Mixing
Proper audio mixing is crucial across all video types. In a product demo, for instance, you want the crisp sounds of the product in use to be audible over a subtle background music track. For educational content featuring an AI avatar, the avatar’s voice must be front and center, with any accompanying music sitting quietly in the background to maintain focus and accessibility.
Actionable Tips for Implementation
- Use Headphones: Always mix your audio using headphones, not just speakers. Headphones provide a more accurate representation of the sound, helping you catch subtle issues you might otherwise miss.
- Set Dialogue Levels First: Aim for your primary audio, like dialogue or a voiceover, to peak between -6dB and -3dB on your editor’s audio meters. This leaves enough headroom to avoid distortion.
- Balance Background Music: A good rule of thumb is to set background music levels approximately 15-20dB lower than your dialogue. This ensures it complements the video without competing with the main audio.
- Utilize Audio Keyframes: Use keyframes to dynamically adjust audio levels. For example, you can lower the music volume during dialogue and raise it during visual-only segments for a more professional sound.
6. Create a Story Structure with Compelling Openings and Closings
Even the shortest clips benefit from a basic story structure: a clear beginning that hooks viewers, a middle that delivers value, and an end that provides a resolution or call to action. Beginners often jump straight into the main content, but without a compelling opening and a satisfying closing, videos can feel disjointed and incomplete. A strong start determines if viewers watch past the first three seconds, while a strong finish ensures they remember your message and take the desired next step.
This narrative framework transforms a simple video into a purposeful journey for the viewer. It’s one of the most crucial video editing tips for beginners because it shifts the focus from just assembling clips to crafting a cohesive and impactful message. Whether it's a 30-second social media ad or a five-minute tutorial, a clear structure keeps your audience engaged from start to finish.
How to Apply Story Structure
For a product video, open with a bold benefit statement or a question that highlights a common problem. The middle section can showcase the product in action, and the closing should feature a clear call to action (CTA), like "Shop Now." In a tutorial, the opening can present the problem you're solving, the middle can break down the solution into steps, and the closing can suggest what to learn next or ask viewers to subscribe.
Actionable Tips for Implementation
- Outline Before Editing: Before you even open your editing software, write a simple three-part outline: a hook for the opening, key points for the middle, and a CTA for the closing.
- Hook Within 3 Seconds: Grab attention immediately. Ask a provocative question, show a surprising visual, or state a powerful benefit to prevent viewers from scrolling away.
- Balance Your Timeline: A good rule of thumb is to dedicate roughly 20% of your video's runtime to the opening, 60% to the main content, and 20% to the closing.
- Include a Clear CTA: Always tell your audience what you want them to do next. This could be to visit your website, follow your page, comment on the video, or subscribe to your channel.
7. Master Basic Keyboard Shortcuts for Speed and Efficiency
One of the most significant upgrades to your video editing process is moving from mouse-clicking menus to using keyboard shortcuts. While it requires a small initial learning curve, mastering essential shortcuts dramatically accelerates your workflow, allowing you to edit two to three times faster than before. Professional editors rely almost exclusively on their keyboards for a reason: it's fluid, precise, and incredibly efficient.
This practice is one of the most impactful video editing tips for beginners because it builds a foundation for professional-level speed. Instead of navigating through menus to find tools like the cut or trim tool, a simple key press executes the command instantly. This keeps your focus on the timeline and the creative flow of your edit, minimizing interruptions and wasted motion. Whether you're in Premiere Pro, Final Cut Pro, or DaVinci Resolve, the core concept remains the same: less clicking means more creating.
How to Apply Keyboard Shortcuts
Start by identifying the actions you perform most frequently. For most beginners, this includes making cuts, deleting clips, undoing mistakes, and navigating the timeline. For example, instead of grabbing the "Razor Tool" with your mouse, simply press 'C' in Premiere Pro to activate it, make your cut, and press 'V' to return to the selection tool. Another classic is using the J-K-L keys to shuttle backward, pause, and play forward through your footage at various speeds.
Actionable Tips for Implementation
- Start with the Essentials: Don't try to learn everything at once. Focus on 5-10 core shortcuts for navigation (zooming in/out), cutting, and deleting.
- Print a Cheat Sheet: Keep a printed list of your software’s most common shortcuts next to your monitor for quick reference.
- Practice Deliberately: Dedicate your next editing session to using shortcuts exclusively for a few key tasks. The muscle memory will build quickly.
- Customize Your Workspace: As you advance, you can customize shortcuts to fit your personal workflow, mapping your most-used functions to easily accessible keys.
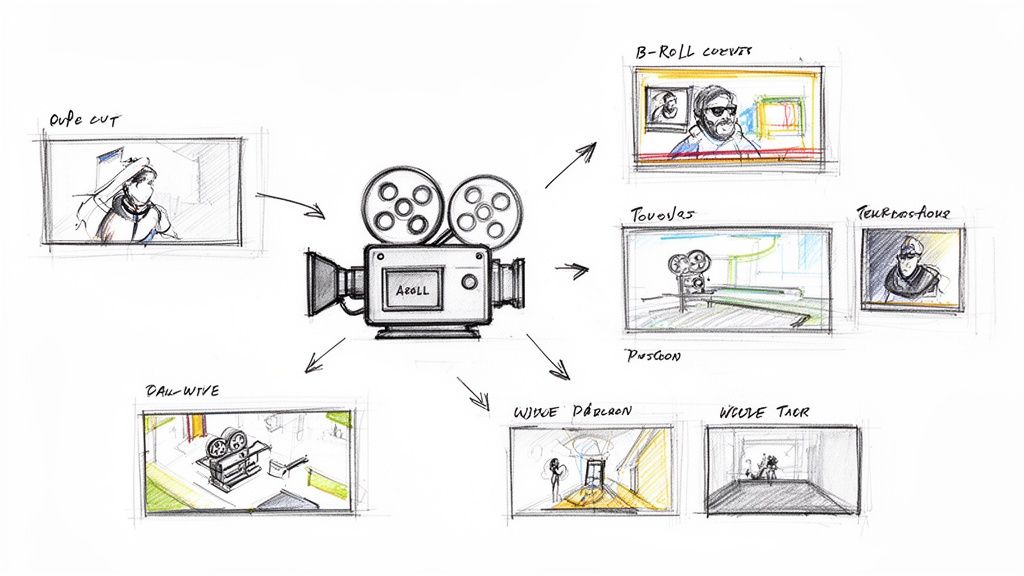
8. Use B-Roll Effectively to Enhance Visual Storytelling
B-roll is the supplemental footage that complements your primary shots (A-roll) to build a richer visual narrative. It can include product close-ups, environmental shots, or action sequences that add context and dynamism to your story. Using B-roll effectively is one of the most powerful video editing tips for beginners because it transforms a simple talking-head video into an engaging, professional-looking piece of content.
This technique is essential for breaking up visual monotony, covering up awkward edits or jump cuts, and reinforcing the key messages delivered in your main footage. For example, while a narrator discusses a product's benefits, the B-roll can visually demonstrate those features in action, making the information more impactful and easier for viewers to understand.
How to Apply B-Roll Effectively
Implementing B-roll is about strategic layering. In a product video, your A-roll might be a person speaking to the camera. You would then layer B-roll clips over their voice-over, showing close-ups of the product, different angles of its design, or someone using it in a real-world scenario. This keeps the video visually stimulating and helps viewers connect with the product on a deeper level.
Actionable Tips for Implementation
- Plan Your Shots: Before filming, create a list of B-roll shots that will support your main narrative points. Think about what visuals would best illustrate your script.
- Gather Variety: Capture multiple angles, shot types (wide, medium, close-up), and variations of each B-roll scene. This gives you more creative options during the editing process.
- Maintain Consistency: Ensure your B-roll footage matches the A-roll in terms of lighting, color, and overall style. This creates a seamless and professional viewing experience.
- Cover Jump Cuts: Use B-roll to hide edits where you've cut out mistakes or pauses from your main footage. Placing a relevant clip over the cut makes the transition invisible to the viewer.
9. Understand and Apply Basic Color Grading for Visual Style
Color grading is the creative process of altering and enhancing the color of your video to establish a specific mood, tone, and visual style. While color correction fixes issues to make footage look natural, color grading is about making it look intentional and artistic. Applying a specific grade can instantly transform a generic clip into a polished, professional piece with a distinct emotional impact.
This technique is one of the most powerful video editing tips for beginners because it directly influences how an audience feels. For example, warm, golden tones can evoke friendliness and comfort, making them ideal for e-commerce product videos. Conversely, cool, blueish tones can convey professionalism and trust, perfect for corporate tutorials. Mastering basic color grading helps create a consistent, recognizable look across all your content.
How to Apply Basic Color Grading
Most video editing software includes tools to adjust hue, saturation, and luminance (brightness) for shadows, mid-tones, and highlights. For a social media video promoting a summer brand, you might boost the saturation and warm up the highlights to create a vibrant, sunny feel. For a tech explainer, you could slightly desaturate the colors and add a cool tint to the shadows for a sleek, modern aesthetic.
Actionable Tips for Implementation
- Start with Subtle Adjustments: A common beginner mistake is over-saturating colors. Make small, incremental changes to saturation, contrast, and temperature to avoid an unnatural look.
- Create and Use Presets: Once you find a look you like, save it as a preset or a Look-Up Table (LUT). This allows you to apply the same grade instantly to future videos for brand consistency.
- Study References: Look at films, commercials, or competitor content in your niche. Analyze how they use color to set the mood and try to replicate those styles to learn what works.
- Leverage AI for Styling: Tools like Veemo AI can apply stylistic grades automatically. You can prompt the AI to generate a video with a "cinematic warm tone" or a "vintage film look," streamlining the entire process.
10. Organize Your Project with Smart File Management and Naming Conventions
Proper project organization is a non-negotiable habit that saves immense time and prevents headaches during editing and revisions. Beginners often dump all their files into one folder, leading to a chaotic mess of poorly named assets. Smart organization involves creating a logical folder hierarchy and using consistent file naming conventions to ensure every element is easy to find, share, and back up.
This disciplined approach transforms your workflow from confusing to efficient. Instead of hunting for a specific audio clip or graphic, you’ll know exactly where it is. This is one of the most crucial video editing tips for beginners because it builds a professional foundation that scales with you as your projects become more complex. A well-organized project is simple to navigate, collaborate on, and revisit months later.
How to Apply Smart Organization
Before you import a single clip, create a master project folder. Inside it, build a clear structure with subfolders for different asset types. For example, you might create folders like 01_Footage, 02_Audio, 03_Graphics, and 04_Exports. This system keeps your raw files separate from your finished videos.
Actionable Tips for Implementation
- Create a Template Folder: Design a standard folder structure and save it as a template. For every new project, just copy and paste this empty structure to start organized.
- Use a Consistent Naming Convention: Name files methodically. A great format is
YYYYMMDD_ProjectName_Version.mov(e.g.,20240726_SummerPromo_v01.mov). This keeps files chronologically sorted and versions clear. - Label Bins in Your Software: Mirror your folder structure inside your editing software using bins. Create bins for A-Roll (main footage), B-Roll (supplemental shots), and Music.
- Implement a Backup Strategy: Always back up your entire project folder. Use the 3-2-1 rule: three copies of your data, on two different media types, with one copy off-site (like cloud storage).
10-Point Comparison: Beginner Video Editing Tips
| Technique | 🔄 Implementation Complexity | ⚡ Resource Requirements | 📊 Expected Outcomes / Impact | Ideal Use Cases | ⭐ Key Advantages / 💡 Tip |
|---|---|---|---|---|---|
| Start with the Rule of Thirds for Better Composition | Low — simple to apply; practice needed | Minimal — camera grid or editor overlay | Better balance, natural eye flow, more professional-looking footage | Product demos, tutorials, mobile/social content | ⭐ Instantly improves framing; 💡 enable grid overlays, add composition prompts in Veemo |
| Master the Art of Proper Pacing and Timing | Medium — iterative refinement to find rhythm | Moderate — editing time, reference audio/music | Higher retention and clearer storytelling | Ads, product videos, tutorials, AI avatar explainers | ⭐ Boosts engagement; 💡 cut to the beat, test multiple pacing versions |
| Use Color Correction to Enhance Visual Consistency | Medium — technical but learnable steps | Moderate — editing software, calibrated monitor recommended | Consistent exposure/white balance across mixed sources | Mixed-source projects, e‑commerce, series | ⭐ Fixes lighting/color mismatches; 💡 follow exposure→contrast→WB→saturation, save presets |
| Leverage Transitions Strategically (But Don't Overuse Them) | Low–Medium — many options but simple rules | Low — built-in editor transitions adequate | Cleaner scene changes when purposeful; misuse distracts | Narrative cuts, product showcases, subtle avatar switches | ⭐ Clarifies scene changes; 💡 default to cuts, use fades sparingly (≈5–10%) |
| Work with Proper Audio Levels and Audio Mixing | Medium — requires listening skill and practice | Moderate — good headphones/speakers, basic audio tools | Dramatically increased perceived production quality and accessibility | Voiceovers, tutorials, marketing promos, educational content | ⭐ Essential for professionalism; 💡 aim dialogue peaks −6 to −3dB, music 10–15dB below dialogue |
| Create a Story Structure with Compelling Openings and Closings | Medium — requires preplanning and scripting | Low — time to outline and test | Stronger hooks, better retention, clearer CTAs | Promos, tutorials, social hooks, explainers | ⭐ Improves retention and action rates; 💡 hook in first 3s, use 20/60/20 runtime split |
| Master Basic Keyboard Shortcuts for Speed and Efficiency | Low — small learning curve, builds muscle memory | Minimal — practice time | 2–3x faster editing workflows; fewer repetitive motions | Frequent editors, fast turnarounds, batch edits | ⭐ Greatly increases efficiency; 💡 learn top 5–10 shortcuts first and print a cheat sheet |
| Use B‑Roll Effectively to Enhance Visual Storytelling | Medium — needs planning and extra shooting | Moderate — extra shoot time or stock footage | More engaging, hides cuts, raises perceived production value | Product demos, tutorials, lifestyle marketing, explainers | ⭐ Adds context and variety; 💡 shoot 3–5 angles, match color/lighting to A‑roll |
| Understand and Apply Basic Color Grading for Visual Style | Medium–High — needs color sense and calibrated display | Moderate — grading tools, LUTs/presets, calibrated monitor | Distinct mood/brand identity; elevated aesthetic | Branded content, cinematic promos, social aesthetics | ⭐ Creates a signature look; 💡 start subtle, create LUTs/presets for consistency |
| Organize Your Project with Smart File Management and Naming Conventions | Low — upfront discipline, scalable with templates | Low–Moderate — storage, backups, version control | Saves time, simplifies collaboration and revisions | Multi-project workflows, client work, video series | ⭐ Prevents asset loss and confusion; 💡 use YYYYMMDD + versioning, templates and backups |
Start Creating: Your Journey in Video Editing Begins Now
The path from novice to proficient video editor is built one skill at a time. The ten fundamental tips we've explored provide the essential building blocks for that journey, moving you beyond simple cuts and into the realm of compelling visual storytelling. Think of this guide not as a rigid set of rules, but as a reliable framework to support your creative instincts. By mastering these core concepts, you equip yourself to produce content that is not just technically sound, but also emotionally resonant and professional in its execution.
Remember that video editing is a craft where foundational knowledge compounds over time. Consistent file organization today prevents chaotic project failures tomorrow. Understanding the "why" behind a J-cut or L-cut elevates a simple edit into a sophisticated narrative device. This collection of video editing tips for beginners is designed to instill those best practices from the very start, helping you avoid common pitfalls and build a sustainable, efficient workflow that grows with you.
From Fundamentals to Future-Forward Creation
The most impactful takeaway is that great editing is invisible; it serves the story without drawing attention to itself. Your primary goal is to guide the viewer's experience through deliberate choices in pacing, color, and sound.
Here are the key principles to carry forward into every project:
- Story is King: Always prioritize the narrative. Every cut, transition, and color adjustment should enhance the story you are trying to tell.
- Workflow is Freedom: A clean, organized project is not restrictive; it is liberating. It frees up your mental energy to focus on creative decisions rather than searching for lost files.
- Practice is Progress: Your first edit will not be your best, and that is perfectly fine. Each project is an opportunity to experiment, refine your techniques, and develop your unique stylistic voice.
Ultimately, mastering these skills is about transforming your raw footage into a polished, impactful final product. It is about learning the language of visual media so you can communicate your ideas, market your products, or share your stories with clarity and confidence. As you become more comfortable with these foundational techniques, you will find yourself editing faster, more intuitively, and with a greater sense of creative control. This is where the real fun begins, as you start to blend technical skill with artistic vision, creating videos that truly connect with your audience.
Ready to dramatically accelerate your learning curve and bring your ideas to life faster than ever? Combine these foundational skills with the power of artificial intelligence. Explore Veemo AI to generate stunning, stylized video content from simple text prompts, turning your creative concepts into polished visuals in minutes, not hours. Visit Veemo AI to see how our platform can revolutionize your video creation workflow.
Published via the Outrank app