Think of an explainer video script template as your go-to recipe for storytelling. It gives you a reliable structure for your video's narrative, making sure you hit all the crucial points—the problem, your solution, and the call-to-action—in an order that just makes sense. It’s the fastest way I’ve found to take a complicated idea and turn it into a clear, compelling story that grabs people right from the start.
Why Your Explainer Video Script Is The Most Important Part
Before you even think about animation, B-roll, or music, your script is the blueprint for the entire project. It sets the pace, defines the tone, and guides every visual decision. A weak script almost always leads to a confusing video, no matter how slick the production value. A great one, on the other hand, makes sure your message connects and actually gets people to do something.
The data backs this up. Explainer videos are everywhere now. In fact, 73% of video marketers say explainers are their most-used video format, even more than social media stories or testimonials. This isn't just a trend; it's a direct response to how people prefer to learn. A wild 98% of people have watched an explainer video to understand a product or service better. If you want to dive deeper, these video marketing statistics paint a very clear picture of their dominance.
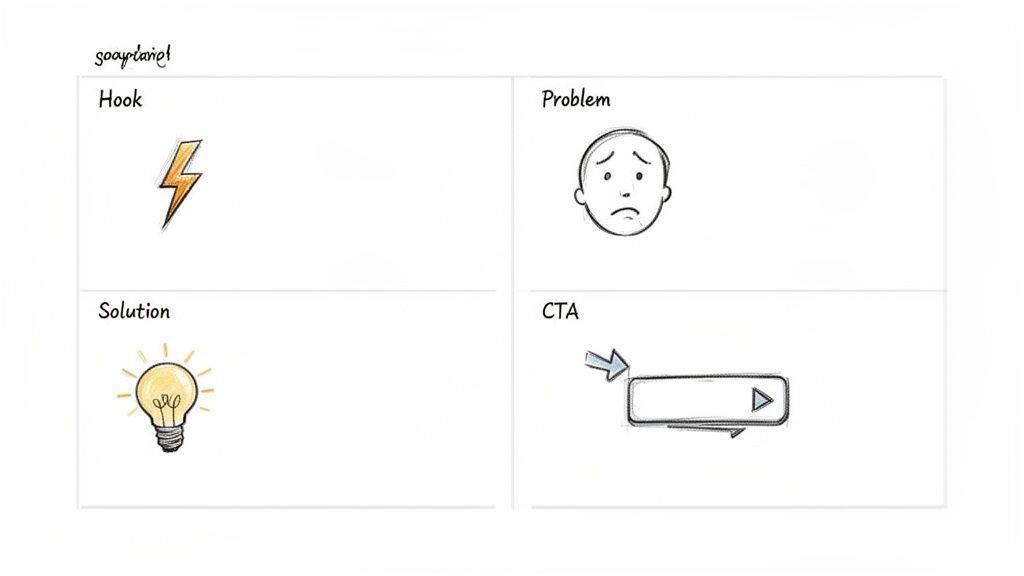
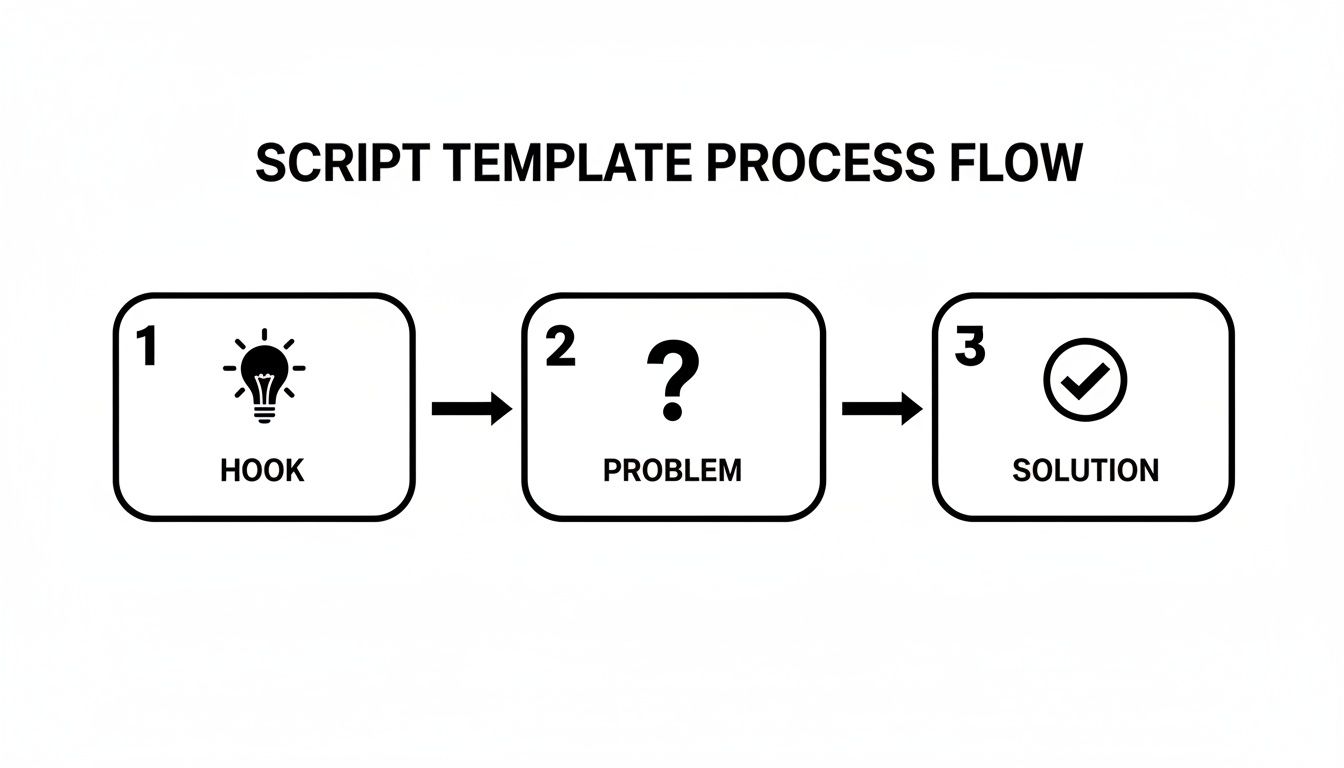
The Foundation: A Problem-Solution Framework
At the heart of almost every effective explainer video is a simple, time-tested narrative arc. It’s a classic for a reason.
- The Problem: You have to start by hooking the viewer with a pain point they know all too well. This builds an instant rapport and shows them you get it.
- The Solution: This is your moment. Introduce your product or service as the hero that solves their specific problem.
- The Benefit: Go beyond just listing features. Show how your solution makes their life better. What's the transformation they can expect?
- The Call-to-Action (CTA): Wrap it up with a clear, direct instruction. Tell them exactly what to do next, whether it’s signing up, downloading, or learning more.
This isn’t just a formula; it’s fundamental storytelling. You're taking your audience on a quick journey from frustration to relief, with your brand as the helpful guide.
Key Takeaway: Don't just list features. Frame your script around the viewer's problem and the ultimate benefit they'll receive. People buy outcomes, not just products.
Explainer Video Script Elements At A Glance
To help you visualize how this framework adapts, here’s a quick reference guide comparing the core components and timing for different types of explainer videos. Use this to choose the right structure for your goals.
| Script Component | 30-Second Social Ad | 60-Second Product Demo | 90-Second SaaS Explainer |
|---|---|---|---|
| Hook | 0-3 seconds. Must be immediate and visual. | 0-5 seconds. State a relatable pain point. | 0-10 seconds. Set a scene or pose a bigger question. |
| Problem | 3-10 seconds. State the core issue clearly. | 5-20 seconds. Elaborate on the problem and its impact. | 10-30 seconds. Detail the challenge and its consequences. |
| Solution | 10-20 seconds. Quick reveal of the product. | 20-45 seconds. Show the product in action, focusing on one key feature. | 30-60 seconds. Walk through 2-3 core features and their benefits. |
| Benefit/Proof | 20-25 seconds. Show a quick, satisfying outcome. | 45-55 seconds. Demonstrate the positive result or share a quick stat. | 60-80 seconds. Showcase the "aha!" moment or a customer testimonial. |
| CTA | 25-30 seconds. Strong, simple, and visual. "Shop Now." | 55-60 seconds. Clear and direct. "Try it for free." | 80-90 seconds. Specific and value-driven. "Request a demo." |
As you can see, the core idea is the same, but the timing and depth change completely depending on the context.
Adapting Your Script For Different Platforms
That core problem-solution framework is your starting point, but you have to tweak it based on where people will be watching. An explainer video script template is never a one-size-fits-all document.
For a 30-second social media ad, for instance, you need a hook that works in under three seconds to stop the scroll. The problem has to be presented almost instantly. The entire message needs to be singular and punchy.
On the other hand, a 90-second SaaS explainer living on your landing page has a bit more breathing room. Here, you can afford to spend more time showing exactly how the software works, walking viewers through key features, and building a more robust case for its value before you ask for the click. Getting these nuances right is what separates a script that just "works" from one that truly performs on each channel.
Ready-to-Go Explainer Video Script Templates
Okay, enough theory. Let's get our hands dirty. This is where we move from planning to actually writing. I’ve put together three battle-tested, fill-in-the-blank templates you can grab and adapt right away.
Each explainer video script template is designed for a specific, high-impact situation. You'll find one for a quick social media hit, another for a more detailed product feature demo, and a third for a full-fledged SaaS explainer. These aren't just bare-bones outlines; they come with my notes on timing, visuals, and real-world examples to show you exactly how to make them your own.
Template 1: The 30-Second Social Media Explainer
This one is all about speed and grabbing attention. It’s built to stop the scroll on platforms like Instagram Reels, TikTok, or Facebook Stories, where you have mere seconds to make your case. The entire goal is to hit them with one problem and one solution, fast.
Best For: E-commerce product reveals, app feature announcements, or hyping up a limited-time offer.
(VOICEOVER SCRIPT)
[0-3 Seconds] The Hook:
- VO: "Tired of [Common Frustration]?"
- Visuals: Show a quick, relatable shot of the problem. Think of someone looking totally overwhelmed by a messy closet.
[3-10 Seconds] The Problem:
- VO: "You try to [Attempted Fix], but you just end up with [Negative Outcome]."
- Visuals: A rapid-fire montage of failed attempts. For the closet, this could be clothes slipping off hangers or drawers that won't close.
[10-20 Seconds] The Solution:
- VO: "Introducing [Your Product Name]. The simple way to [Achieve Desired Outcome]."
- Visuals: A dramatic reveal of your product. Imagine a sleek box of space-saving hangers being unboxed.
[20-25 Seconds] The Benefit:
- VO: "Now you can [Main Benefit] in seconds."
- Visuals: The "after" shot. The payoff. A beautifully organized closet, looking serene and perfect.
[25-30 Seconds] The Call-to-Action (CTA):
- VO: "Tap below to get yours!"
- Visuals: A clear shot of the product with bold text overlay: "Shop Now" and an arrow pointing right where the button is.
Pro Tip: On social, your visuals do half the talking. Use bright, high-contrast imagery and quick cuts to keep the energy high. Your first three seconds have to be compelling even with the sound off, because they often are.
Template 2: The 60-Second Product Demo
With a full minute, you have a bit more room to breathe. This script is perfect for a landing page or a product page where someone has already shown interest and is thinking, "Okay, but how does it actually work?" You'll focus on one key feature and the immediate benefit it provides.
Best For: A physical product with a unique selling point, a core function of a mobile app, or a simple software tool.
(VOICEOVER SCRIPT)
| Timing | Voiceover (VO) | Visual & On-Screen Text (OST) |
|---|---|---|
| 0-5s | "Trying to [Accomplish a Specific Task] can be a real headache." | Visual: A user struggling with the "old way" of doing something, like manually typing expenses into a spreadsheet. |
| 5-15s | "You waste time on [Pain Point 1] and you're always worried about [Pain Point 2]." | Visual: Zoom in on the frustrating details of the old method. OST: "Complex Spreadsheets?" |
| 15-30s | "That's why we created [Your Product Name]. It uses [Key Technology] to handle all of that for you." | Visual: A clean, animated intro to your product or app interface. Make it look slick. |
| 30-45s | "Just [Step 1], then [Step 2], and you’re done. The app automatically [Does the Magic Thing]." | Visual: A screen recording or animation clearly walking through those two steps. Highlight the feature in action. |
| 45-55s | "So you can stop worrying about [The Problem] and get back to [What They'd Rather Be Doing]." | Visual: Show the user looking relieved and happy, maybe enjoying a cup of coffee. OST: "Save 5 Hours a Week!" |
| 55-60s | "Ready to simplify your life? Click the link and try [Your Product Name] free for 14 days." | Visual: End on your product logo with a clear CTA button animating on screen. |
Template 3: The 90-Second SaaS Explainer
This is the most comprehensive template, designed for explaining a more complex software-as-a-service (SaaS) product. Here, your job is to build a solid case for the value and show how multiple features work together to solve a bigger problem.
Best For: SaaS platforms, B2B software, or any service that has a multi-step workflow.
(VOICEOVER SCRIPT)
The Hook (0-10 seconds)
- VO: "For modern [Your Target Audience, e.g., 'marketing teams'], juggling [Task 1], [Task 2], and [Task 3] is a constant struggle."
- Visuals: An animated scene is perfect here. Show icons for these tasks floating chaotically around a stressed-out character.
The Problem (10-30 seconds)
- VO: "Your data is all over the place, communication gets lost in endless email threads, and you can never get a clear picture of what's working. That means missed deadlines and wasted budget."
- Visuals: Animate data flowing between disconnected app logos (spreadsheets, email, project tools), ending with a big red "Deadline Missed!" notification.
The Solution Introduction (30-40 seconds)
- VO: "Meet [Your Platform Name], the single platform that brings your entire workflow into one place."
- Visuals: The chaotic icons from the opening scene now flow neatly into your platform's dashboard logo. The dashboard appears on screen, looking clean and organized.
How It Works (40-75 seconds)
- Feature 1 Benefit: "First, connect your accounts in one click to create a single source of truth for all your data." (Show a clean data visualization on the dashboard).
- Feature 2 Benefit: "Next, build automated workflows to handle all those repetitive tasks, freeing your team up to focus on big-picture strategy." (Show a simple drag-and-drop workflow builder in action).
- Feature 3 Benefit: "Finally, generate instant reports that give you a clear, real-time view of your ROI." (Show a beautiful, easy-to-read report being exported).
The Final Benefit & CTA (75-90 seconds)
- VO: "Stop chasing data and start driving results. See how [Your Platform Name] can transform your team's productivity. Sign up for a personalized demo today."
- Visuals: End with a shot of the platform on a laptop, maybe with a happy, collaborative team in the background. Hold on your logo and URL.
Don't Forget to Mix Up Your CTAs
A generic "click here" is a wasted opportunity. You need to match your call-to-action to where the viewer is in their journey and what you want them to do next.
- For Low Commitment: "Learn more at [YourWebsite.com]" or "Watch another video."
- For Lead Generation: "Download our free guide" or "Request a free quote."
- For Direct Sales: "Start your free trial" or "Get 20% off your first order."
- For Engagement: "Comment below with your biggest challenge" or "Tag a colleague who needs this."
Picking the right explainer video script template is a huge first step. Once you fill these proven frameworks with your brand's unique voice and value, you'll have a powerful asset ready to educate your audience and, most importantly, get them to act.
Turning Your Script into a Video with AI
A great script is the foundation, but it’s just the beginning. The real challenge has always been turning those words into a compelling video that grabs your audience and gets them to act. Not long ago, this was the most expensive and time-consuming part of the process, often demanding huge budgets and specialized agencies.
But things have changed. Drastically.
The entire economic model for creating explainer videos has been upended. A professionally animated explainer could easily set you back anywhere from $5,000 to $75,000. With AI tools, you can now produce high-quality video for a tiny fraction of that cost. It's not a niche trend, either—nearly 57% of online ads now incorporate AI-generated video. If you want to see just how much production has evolved, check out these insights on modern explainer video production.
This shift makes it possible for anyone to follow the classic narrative formula that works so well.
Your script already maps out this journey from Hook to Problem to Solution. Now, let's use AI to bring each of those building blocks to life on screen.
Breaking Down Your Script for AI
The first step in using an AI video generator like Veemo AI is to think of your script not as a single chunk of text, but as a sequence of visual moments. You need to translate your written words into specific instructions for the AI.
Go through your script line by line, paying close attention to the visual cues and action notes you added.
Let's take a line from our SaaS script template:
VO: "Your data is all over the place, communication gets lost in endless email threads, and you can never get a clear picture of what's working."
You wouldn't just dump that whole sentence into an AI generator. It contains three distinct visual ideas. Your job is to break them down into separate, actionable prompts the AI can actually work with.
- Prompt 1: "An animated icon of a spreadsheet exploding into scattered papers, minimalist style."
- Prompt 2: "A fast-moving animation of email icons flying chaotically across the screen."
- Prompt 3: "A close-up shot of a confused business person looking at a blurry, unreadable chart on a computer screen, cinematic lighting."
This translation process—from narrative to concrete visual prompts—is the secret to getting high-quality, relevant clips.
Generating Your Core Video Clips
With your list of prompts ready, you can start creating the visual building blocks of your video. An all-in-one platform like Veemo AI is perfect for this, as it lets you manage the entire workflow in one place.
You’ll input each prompt and define a few key parameters before you hit "generate." Don't skip these settings; they’re crucial for making sure your final video looks polished and is ready for its intended platform.
Key Generation Settings:
- Aspect Ratio: This one is non-negotiable. Choose 9:16 for vertical platforms like TikTok or Instagram Reels. Go with 16:9 for standard horizontal videos on YouTube or your website. Getting this right from the start will save you a world of pain in editing.
- Style and Mood: Guide the AI's creative direction with descriptive keywords. Adding terms like "cinematic," "photorealistic," "flat animation," "warm lighting," or "corporate and clean" to your prompt has a massive impact on the look and feel.
- Duration: Be specific about how long each clip should be. For a fast-paced explainer, individual shots are often just 2-4 seconds long. This keeps the energy high and the viewer engaged.
Pro Tip: Always generate a few variations for each prompt. The AI might interpret your text in slightly different ways, and having options gives you more creative control when you're piecing the final video together. You can pick the one shot that perfectly nails the tone.
Adding Voiceovers and AI Avatars
Once your visuals are in place, it’s time for the audio. Modern AI platforms are much more than just video generators; they’re full-blown production studios. You no longer have to hire a voice actor or book a recording studio (unless you want to, of course).
You can generate a surprisingly human-like voiceover directly from your script. Just paste the narration into the tool, pick a voice style you like—professional male, friendly female, energetic—and the AI creates a clean audio track timed perfectly to your video.
For some videos, like tutorials or corporate presentations, you can even go a step further and create an AI avatar. Instead of just a voice, you get a lifelike digital presenter who speaks your script directly to the camera. It’s a great way to add a human touch without the hassle and cost of a live-action shoot.
Putting the Final Polish on Your Video
Getting your initial video clips from an AI tool is a huge win, but the real magic happens in the final edit. This is where you take those raw assets and weave them into a polished, professional video that actually connects with your audience. You don't need a massive editing budget; a few key steps can make all the difference.
Don't underestimate this final stage. The market for tools that help create these videos is exploding for a reason—they work. The explainer video software space was already valued at around $6.4 billion and is on track to hit $26.3 billion as more and more businesses catch on. You can get a deeper look into the explainer video software market to see just how fast it's growing.
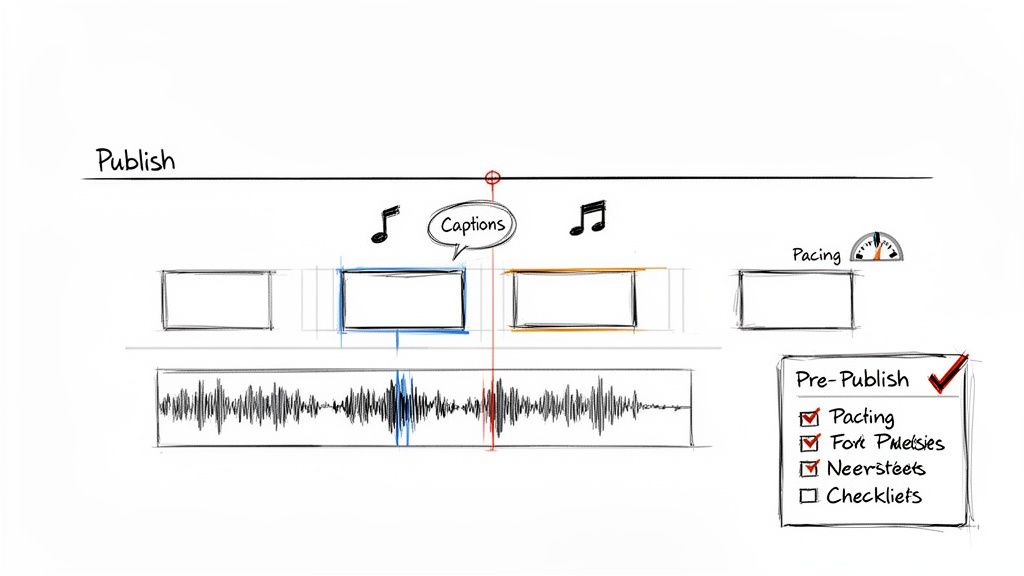
Nail Your Pacing and Timing
Pacing is the heartbeat of your video. It’s all about how your visuals sync up with the script's narration. You want each scene to flow seamlessly into the next, keeping your viewer locked in.
Start by dropping your voiceover track onto your editing timeline. This is your guide. Now, lay your video clips over it, making sure the action on screen matches what's being said. If the script says, "Click the 'Sign Up' button," that's the exact moment the cursor should be shown clicking that button.
Pro Tip: Awkward timing is a surefire way to lose a viewer. Try reading your explainer video script template out loud while you watch the visuals. If anything feels rushed or like it’s dragging, start adjusting the clip lengths until the whole thing feels natural and smooth.
Get the Sound Design Right
Audio is easily 50% of the video experience. The right soundtrack can completely change how a viewer feels about your message.
- Background Music: Pick a track that fits the vibe. A positive, upbeat tune is great for a video focused on a solution, whereas a more low-key, ambient track might be better for explaining a complex piece of software.
- Sound Effects (SFX): Little things make a big difference. A subtle "swoosh" for a transition or a "click" for a button press adds a layer of professionalism and makes the video feel more alive.
- Audio Levels: This is critical. Your background music should never compete with the voiceover. The narration needs to be front-and-center, crisp and clear. As a rule of thumb, I keep my background music about -18 to -20 decibels quieter than the voiceover track.
Balancing these elements ensures your audio elevates the story instead of getting in the way.
Add On-Screen Text and Captions
Let's be real: a lot of people watch videos on their phones with the sound off. Text overlays and captions aren't just a nice-to-have anymore; they're essential.
Use bold on-screen text to call out key stats, important features, or your call to action. Keep it short and sweet, and make sure the font is easy to read and fits your brand. For the full narration, add closed captions. Most modern editing tools can auto-generate these from your audio, which is a massive time-saver.
It's a small step that guarantees your message gets across, whether the volume is on or not.
Your Pre-Publishing Checklist
Before you unleash your video on the world, run through one final check. This is your chance to catch those small, silly mistakes that can undermine all your hard work.
- Watch the Final Cut: Seriously, watch it one last time from beginning to end. Look for any weird visual glitches, typos in your text, or audio pops.
- Make a Killer Thumbnail: Don't just let YouTube or LinkedIn pick a random frame. Design a custom thumbnail that’s bright, engaging, and tells people exactly what the video is about.
- Optimize Your Title and Description: Use your main keywords in the video's title and description. This is how you'll get found in search.
- Add Smart Tags: Use a mix of broad and super-specific tags. This helps the platform's algorithm figure out who to show your video to.
Running through this checklist ensures every video you publish is set up for success.
Common Mistakes To Avoid In Your Script
Even with the best templates in hand, it's remarkably easy to stumble into a few common traps that can completely derail your explainer video. Getting the script right isn't just about what you include; it's also about what you leave out.
Let’s walk through some of the biggest mistakes I see people make, so you can sidestep them entirely.
Mistake #1: The Kitchen Sink Approach
The single biggest offender? Trying to cram way too much information into a 60 or 90-second video. I get it—you’re proud of your product, and it has 20 amazing features. The temptation to list them all is strong, but it's a trap.
When you try to explain everything, you end up explaining nothing clearly. The viewer is left overwhelmed, confused, and they won't remember a single thing.
Pro Tip: Pick the one core problem your product solves better than anyone else and build your entire story around that. A focused message is a memorable message. Resist the urge to turn your script into a feature list.
Mistake #2: Speaking in Jargon
Another classic blunder is writing the script using your internal company lingo. You might love your "proprietary synergistic algorithm," but your customer just wants to know if your app saves them time.
Using complex industry jargon is the fastest way to alienate your audience. The moment they have to pause and try to figure out what you mean, you’ve lost them. They'll just click away.
Here’s a simple gut check to keep your language clear:
- Explain it to a friend: Imagine you’re at a coffee shop telling a friend about what you do. Use those exact words.
- Read it out loud: Does it sound stiff and robotic? If it doesn't flow like a natural conversation, it's time for a rewrite.
- Focus on the outcome: Don't describe the tech. Describe what the tech does for the user. Instead of "dynamic data integration," say "it pulls all your reports into one place, automatically."
Clarity always wins. Simple, direct language builds trust and makes your solution feel approachable.
Mistake #3: A Weak (or Missing) Call-to-Action
Finally, and this one is critical, is failing to tell the viewer what to do next. You’ve done all this work to hook them, present a problem they can relate to, and show off your brilliant solution. Now what?
Don't leave them hanging! A vague "check out our website" just isn't going to cut it. You need to give them a specific, direct, and compelling next step. This is your chance to turn a passive viewer into an active lead.
Make your call-to-action the logical conclusion to your story. Whether it's "Start Your Free Trial," "Download the Guide," or "Book a Demo," make it impossible to miss.
Got Questions? We've Got Answers
Even with the best templates, you're bound to run into a few tricky spots when you're writing your script and getting ready to produce your video. Let's tackle some of the most common questions that pop up.
How Long Should My Explainer Video Be?
There's no magic number here—it all comes down to where you're posting the video and what you want to achieve. But after producing hundreds of videos, we've found some pretty reliable benchmarks.
- Social Media (TikTok, Reels): Keep it tight, around 30-60 seconds. The goal is to stop the scroll and land one key message, fast.
- Website Product Demo: You've got a bit more breathing room here, so aim for 60-90 seconds. People on your site are already curious, so you have their attention to show off key features and benefits.
- Complex SaaS Explainer: For a deep dive into your software, you can push it to 2-3 minutes. Just make sure every single second is earning its keep by adding value and pushing the narrative forward. Don't let it drag.
Our Pro Tip: When in doubt, go shorter. If you can tell the same story in 60 seconds instead of 90, do it. Nothing keeps an audience engaged like respecting their time.
How Do I Write a Script That Doesn't Sound Robotic?
This is a big one. The best trick I've ever learned is ridiculously simple: read your script out loud.
Seriously. If you stumble over words or it feels stuffy and unnatural when you speak it, it's going to sound ten times worse in the final video.
Write like you talk. Use simple language and don't shy away from contractions (think "you're" instead of "you are"). A great little mental trick is to imagine you're explaining your product to a friend at a coffee shop. Capture that energy, and you've got your perfect tone.
Can I Really Make a Professional-Looking Video with AI?
One hundred percent. That's exactly why these new AI video platforms exist—they're built to take your text script and turn it into something that looks amazing, no film school or complex software required.
The magic is in the guided workflow. You just describe the scene you want in plain English, and the AI handles the heavy lifting, generating the visuals for you. From there, it's a simple process of arranging the clips, adding a high-quality AI voiceover, and hitting export. What used to take weeks of production can now be done in minutes.
How Do I Make the AI Visuals Match My Brand's Style?
This is a crucial step, and modern AI tools are surprisingly good at it. You just need to be specific in your prompts.
Think of yourself as an art director. By adding stylistic keywords into your scene descriptions, you can guide the AI's output. For example, a prompt with "cinematic, warm lighting" will produce a dramatically different result than one with "minimalist, clean animation."
Many tools, like Veemo AI, also have features to refine your visuals after they're generated, letting you apply a consistent style across all your clips. This way, the final video feels like it came directly from your brand, not a robot.
Ready to turn that script into a finished video? Veemo AI is an all-in-one studio designed to bring your words to life in minutes. Generate stunning visuals, add a professional voiceover, and produce your next explainer video today at https://veemo.ai.